本文共 6080 字,大约阅读时间需要 20 分钟。
网站前台分析
1.1网站前台有哪些页面
- 网站首页
- 商家(店铺)首页
- 商品详细页
- 商品搜索页
- 购物车列表页
- 购物选项选择页
- 支付页
- 用户注册页
- 用户登陆页
- 用户中心页等
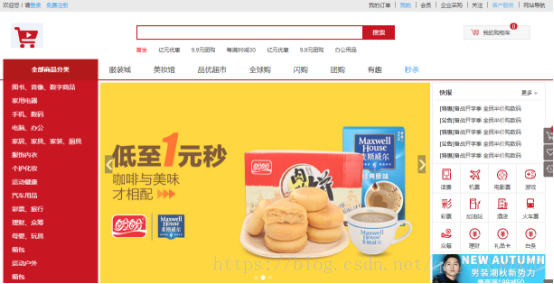
1.2网站首页广告
- 首页海报(轮播图)
- 今日推荐
- 猜你喜欢
- 楼层广告
1.3数据库表结构分析
tb_content_category 广告分类表
| 字段 | 类型 | 长度 | 含义 |
| id | Bigint |
| 主键 |
| name | Varchar | 255 | 广告分类名称 |
tb_content 广告表
| 字段 | 类型 | 长度 | 含义 |
| id | Bigint |
| 主键 |
| category_id | Bigint |
| 广告分类ID |
| title | varchar | 200 | 广告标题 |
| url | varchar | 500 | 广告链接 |
| pic | varchar | 300 | 图片地址 |
| status | varchar | 1 | 状态 |
| sort_order | int |
| 排序 |
2.运营商后台-广告类型及广告管理
2.1需求分析
实现广告类型表与广告表的增删改查
2.2准备工作
2.2.1构建工程
构建工程
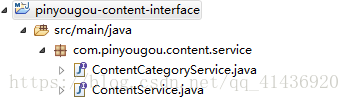
- mall-content-interface
引入依赖mall-pojo
创建包com.cblue.content.service
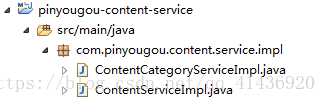
- mall-content-service (WAR)
引入依赖参见mall-sellergoods-service
引入tomcat插件配置 ,指定tomcat的运行端口为9002
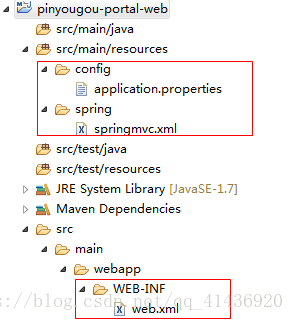
为mall-content-service 工程添加web.xml
创建包 com.cblue.content.service.impl
添加spring相关配置文件(改图)
applicationContext-service.xml
| <dubbo:protocol name="dubbo" port="20882"></dubbo:protocol> <dubbo:application name="mall-content-service"/> <dubbo:registry address="zookeeper://192.168.25.129:2181"/> <dubbo:annotation package="com.mall.content.service.impl" /> |
注意:我们目前有两个服务工程,当两个工程同时启动时会发生端口冲突,因为连接dubbox注册中心的端口默认是20880。所以我们需要配置一下mall-content-service工程的dubbox端口
(3)mall-manager-web工程引入依赖mall-content-interface
2.2.2生成代码拷入工程(换图)
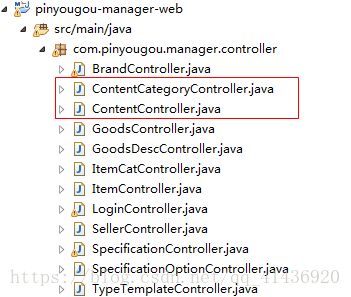
拷贝JS代码到mall-manager-web

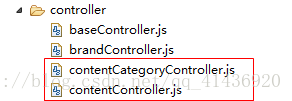
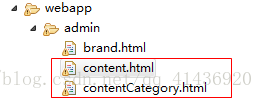
测试运行广告分类管理 和广告管理页面
2.3广告管理
2.3.1广告图片上传
将mall-seller-web的以下资源拷贝到mall-manager-web
(1)UploadController.java
(2)uploadService.js
(3)application.properties
(4)fdfs_client.conf
在mall-manager-web 的springmvc.xml中添加配置
| <!-- 配置多媒体解析器 --> <bean id="multipartResolver" class="org.springframework.web.multipart.commons.CommonsMultipartResolver"> <property name="defaultEncoding" value="UTF-8"></property> <!-- 设定文件上传的最大值 5MB,5*1024*1024 --> <property name="maxUploadSize" value="5242880"></property> </bean> |
在contentController.js引入uploadService
| //控制层 app.controller('contentController' ,function($scope,$controller,contentService,uploadService){ |
在content.html 引入JS
| <script type="text/javascript" src="../js/service/uploadService.js"> </script> |
在contentController.js编写代码
| //上传广告图 $scope.uploadFile=function(){ uploadService.uploadFile().success( function(response){ if(response.success){ $scope.entity.pic=response.message; }else{ alert("上传失败!"); } } ).error( function(){ alert("上传出错!"); } ); } |
修改content.html实现上传功能
| <tr> <td>图片</td> <td> <input type="file" id="file"> <button ng-click="uploadFile()">上传</button> <img alt="" src="{ {entity.pic}}" height="100px" width="200px"> </td> </tr> |
列表中显示图片
| <img alt="" src="{ {entity.pic}}" height="50px" width="100px"> |
2.3.2广告类目选择
运营后台将服务contentCategoryService引入contentController.js中
在content.html 引入contentCategoryService.js
在contentController.js中添加代码
| //加载广告分类列表 $scope.findContentCategoryList=function(){ contentCategoryService.findAll().success( function(response){ $scope.contentCategoryList=response; } ); } |
在content.html 初始化调用此方法
| <body class="hold-transition skin-red sidebar-mini" ng-app="mall" ng-controller="contentController" ng-init="findContentCategoryList()"> |
将广告分类改为下拉列表
| <select class="form-control" ng-model="entity.categoryId" ng-options="item.id as item.name for item in contentCategoryList"></select> |
2.3.3广告状态显示
修改content.html
| <input type="checkbox" ng-model="entity.status" ng-true-value="1" ng-false-value="0"> |
修改contentController.js
| $scope.status=["无效","有效"]; |
修改content.html的列表
| { {status[entity.status]}} |
3.网站首页-广告展示
3.1需求分析
修改首页,当其轮播广告图根据后台设置的广告列表动态产生。
3.2准备工作
3.2.1工程搭建
创建war模块mall-main-web ,此工程为网站前台的入口,参照其它war模块编写配置文件。不需要添加SpringSecurity框架
pom.xml中配置tomcat启动端口为9103
3.2.2前端
(1)拷贝资源:资源文件夹中 “前台页面”目录下的index.html以及相关目录拷贝到mall-main-web
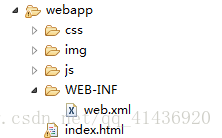
(2)添加angularJS库

- 在js文件夹创建base.js 和 base_pagination.js ,创建service 和controller文件夹
3.3后端代码
3.3.1服务接口层
在mall-content-interface工程ContentService接口增加方法定义
| /** * 根据广告类型ID查询列表 */ public List<TbContent> findByCategoryId(Long categoryId); |
3.3.2服务实现层
在mall-content-service工程ContentServiceImpl类增加方法
| @Override public List<TbContent> findByCategoryId(Long categoryId) { //根据广告分类ID查询广告列表 TbContentExample contentExample=new TbContentExample(); Criteria criteria2 = contentExample.createCriteria(); criteria2.andCategoryIdEqualTo(categoryId); criteria2.andStatusEqualTo("1");//开启状态 contentExample.setOrderByClause("sort_order");//排序 return contentMapper.selectByExample(contentExample); } |
3.3.3控制层
在mall-main-web创建控制器类 ContentController
| @RestController @RequestMapping("/content") public class ContentController { @Reference private ContentService contentService; /** * 根据广告分类ID查询广告列表 */ @RequestMapping("/findByCategoryId") public List<TbContent> findByCategoryId(Long categoryId) { return contentService.findByCategoryId(categoryId); } } |
3.4前端代码
3.4.1服务层
在mall-main-web工程创建contentService.js
| app.service("contentService",function($http){ //根据分类ID查询广告列表 this.findByCategoryId=function(categoryId){ return $http.get("content/findByCategoryId.do?categoryId="+categoryId); } }); |
3.4.2控制层
创建contentController.js
| //广告控制层(运营商后台) app.controller("contentController",function($scope,contentService){ $scope.contentList=[];//广告集合 $scope.findByCategoryId=function(categoryId){ contentService.findByCategoryId(categoryId).success( function(response){ $scope.contentList[categoryId]=response; } ); } }); |
3.4.3页面
(1)修改mall-main-web工程的index.html,引入JS
| <script type="text/javascript" src="plugins/angularjs/angular.min.js"></script> <script type="text/javascript" src="js/base.js"></script> <script type="text/javascript" src="js/service/contentService.js"></script> <script type="text/javascript" src="js/controller/contentController.js"></script> |
在body上添加指令
| <body ng-app="mall" ng-controller="contentController" ng-init="findByCategoryId(1)"> |
(2)修改首页轮播图
| <!--banner轮播--> <div id="myCarousel" data-ride="carousel" data-interval="4000" class="sui-carousel slide"> <ol class="carousel-indicators"> <li data-target="#myCarousel" data-slide-to="{ {$index}}" class="{ {$index==0?'active':''}}" ng-repeat="item in contentList[1]" ></li> </ol> <div class="carousel-inner"> <div class="{ {$index==0?'active':''}} item" ng-repeat="item in contentList[1]"> <a href="{ {item.url}}"> <img src="{ {item.pic}}" /> </a> </div> </div> <a href="#myCarousel" data-slide="prev" class="carousel-control left"> ‹</a><a href="#myCarousel" data-slide="next" class="carousel-control right">›</a> </div> |
启动后地址栏输入 即可看到首页效果